 Sylva Botanical Journal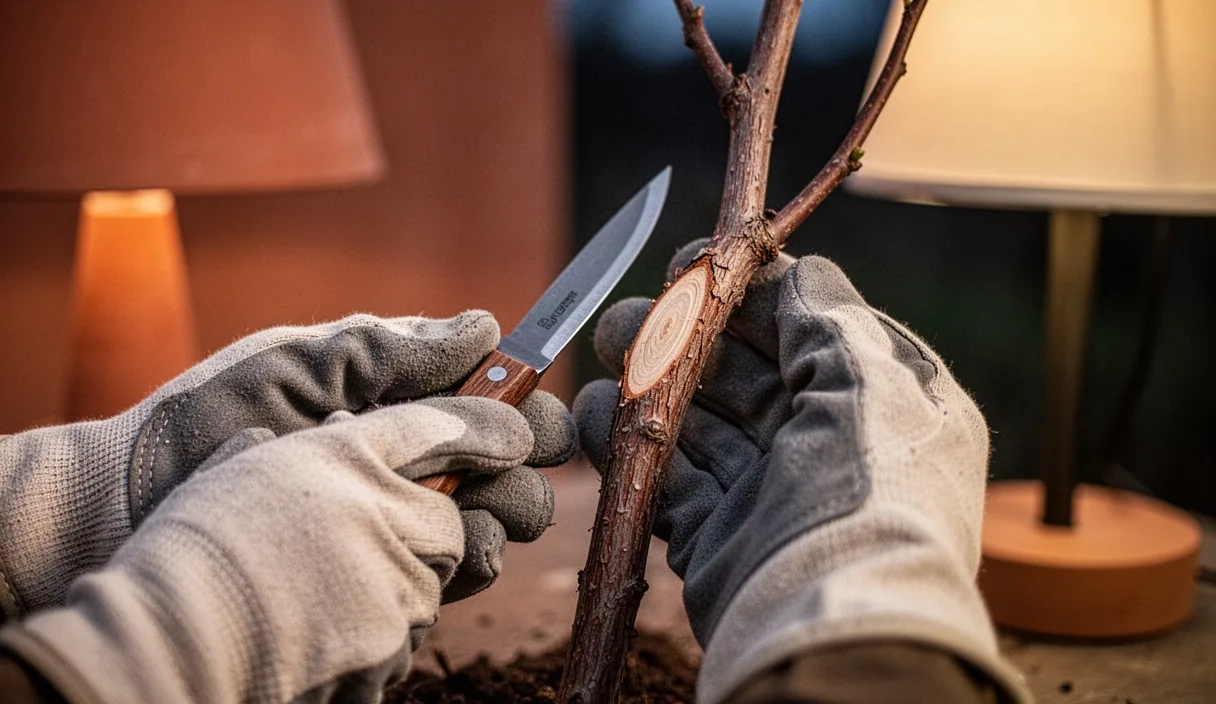
Bench grafting during the late dormant season remains one of the most cost-effective methods for propagating specific woody taxa, especially when working with proprietary seedling rootstocks selected for vigor, soil adaptation, or disease resistance. Unlike clonal understocks produced through stool beds or tissue culture, seedling populations introduce subtle variations in caliper and wood density that require a disciplined hand and careful grading before any cuts are made. The bench operation itself, conducted indoors away from freezing field conditions, permits high volumes of work, provided that the physiological condition of both scion and understock is scrupulously maintained throughout the transition.
Proprietary seedling selections, whether derived from controlled crosses of Malus, Pyrus, or Prunus, present distinct structural challenges compared to uniform clonal selections. The pith may vary in diameter, the cortex can be thicker near the root crown, and sap flow behaves unpredictably if the stock is brought out of cold storage too quickly. Success depends on the mechanical alignment of cambial tissues and the biological management of wound responses, neither of which leaves much room for casual technique.
Scion Wood Selection and Dormant Cold Storage
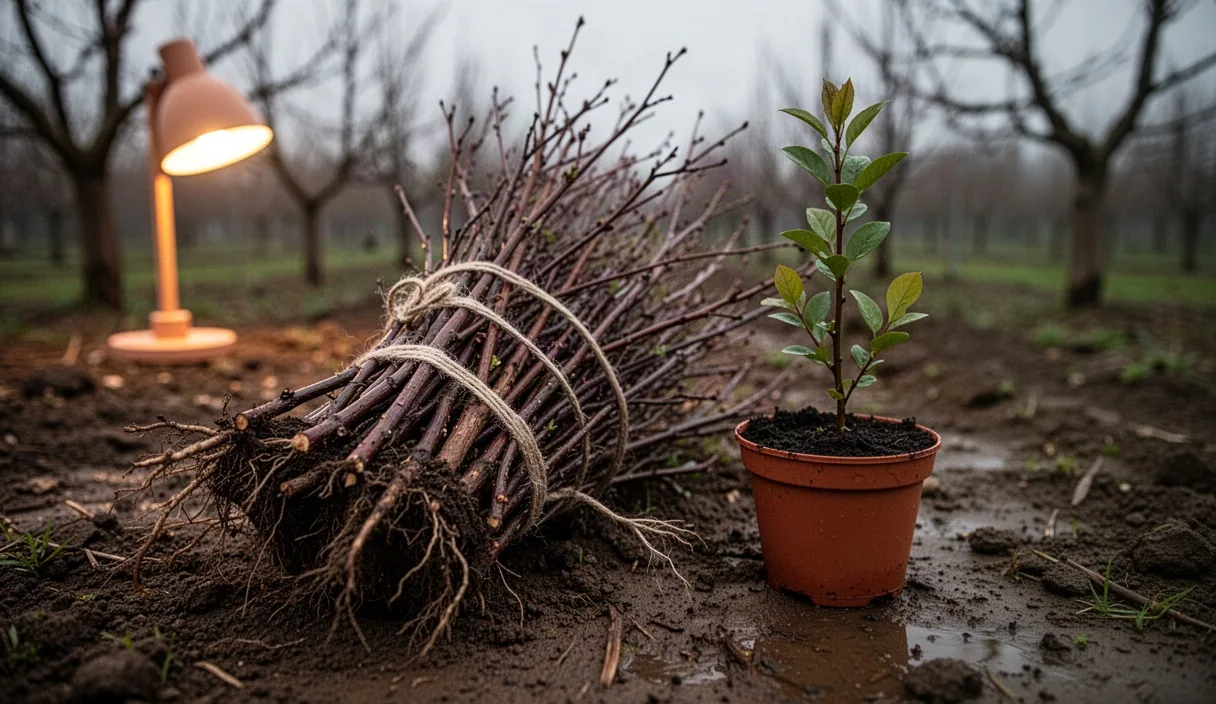
The collection of scion wood should occur exclusively during mid-to-late dormancy, typically between January and early February in temperate zones, well before the swelling of lateral buds. Select pencil-thick, one-year-old vegetative shoots from the upper outer periphery of healthy mother trees. Water sprouts emerging from the deep interior of the canopy should generally be rejected: while they offer tempting lengths of clean wood, their extended internodes and higher proportion of pith to active vascular tissue make them structurally brittle and slower to establish an organized callus bridge. Shoots exhibiting a diameter between 6 and 8 millimeters represent the ideal caliper for balancing handling stability with cambial surface area.
Once gathered, scions must be bundled, labeled clearly with water-resistant tags, and immediately packed to halt moisture loss. The storage environment demands strict control: temperatures must be held between 32 and 34 degrees Fahrenheit (0 to 1.1 degrees Celsius). Allowing the storage temperature to rise above 37 degrees Fahrenheit encourages premature enzymatic activity and bud expansion, which rapidly depletes the finite carbohydrate reserves of the scion before a graft union can form. Relative humidity in the refrigeration unit ought to fluctuate no further than the narrow corridor of 88 to 92 percent.
Packaging materials warrant equal scrutiny. Wood should be wrapped in moistened, unwaxed butcher paper or packed in clean, damp coarse pine shavings, then placed inside perforated polyethylene bags. Media that is too wet will induce lenticel proliferation or fungal blight caused by Botrytis cinerea, while media that is too dry causes desiccation across the bud scales. Under no circumstances should scion wood share a cold room with ripening fruit or organic waste, as even minuscule concentrations of ethylene gas will impair bud dormancy and substantially reduce graft viability.
Rootstock Preparation and Root Trimming Guidelines
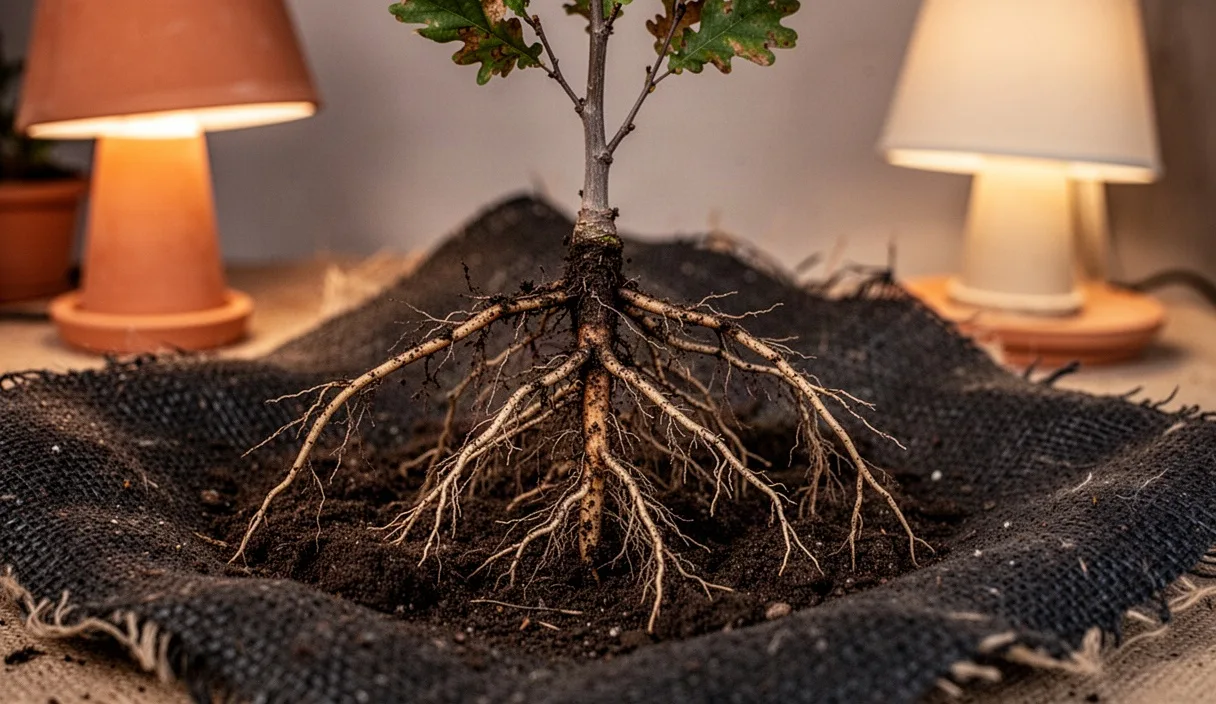
Seedling understocks are lifted from seedbeds during their deep dormant phase and delivered as bare-root whips. Because seedlings display taproot dominant architectures and variable lateral development, they cannot simply be pulled from storage and spliced. The rootstocks must be graded across sorting tables into caliper categories that match the harvested scions, usually grouped by millimeter increments. Discard any seedlings displaying root galls, mechanical crushing from the lifting blade, or discoloration in the vascular collar.
Before grafting commences, root systems require judicious pruning to facilitate handling and promote dense, fibrous regrowth once lined out in the field. The central taproot should be shortened with clean bypass pruners to a length of 12 to 15 centimeters. Excessively long, wandering lateral roots should be pruned back to 6 or 8 centimeters, which prevents root curling or "J-rooting" inside the planting trench or potting container. Fibrous feeding rootlets should be lightly tidied rather than stripped bare, preserving the mycorrhizal associations already colonizing the root cortex.
Washing the rootstocks to remove residual nursery soil is mandatory. Mineral soil particles, particularly quartz sand and river silt, will instantly dull the micro-bevel of a grafting knife, turning precise slicing cuts into ragged, tearing tears. Soak the root systems in cold, clear water for no more than 30 minutes to dislodge grit, then drain them thoroughly. Keep the roots wrapped in damp burlap during the bench work: exposed fine rootlets can desiccate beyond functional recovery in less than twenty minutes in a heated grafting room.
Executing Precise Whip-and-Tongue Knife Cuts
The whip-and-tongue graft remains the standard for bench grafting deciduous fruit and ornamental species due to its exceptional mechanical strength and the broad surface area it presents for cambial contact. The process begins with a single, smooth, sloping cut across the rootstock just above the root crown, approximately 2 to 4 centimeters above the uppermost primary root. The cut must be entirely planar, measuring roughly 3.5 to 4 times the diameter of the stock in length. Hesitation or sawing motions with the blade will create a wavy face, leaving air pockets that prevent cell-to-cell bridging.
To cut the tongue on the rootstock, position the knife blade about one-third of the distance down from the acute tip of the sloping cut. Bring the blade down parallel to the axis of the stem, not following the angle of the slope. Rather than pushing down with force, which risks splitting the stock or running the blade into the thumb, tease the blade downward with a gentle rocking motion, creating an incision roughly 10 to 14 millimeters deep. The wood should yield with a firm, clean cleft without grain splintering.
The scion is prepared in an identical fashion, matching the angle and length of the stock cut precisely. Select a scion piece bearing two to three plump, dormant vegetative buds, and execute the primary diagonal cut immediately below the lowest bud. Cut the matching tongue one-third of the way down from its tip. Interlock the two components by sliding the tongues together until the cambial edges seat firmly against one another. If the scion and rootstock differ slightly in diameter, force alignment along one flank exclusively. Alignment of the vascular cambium on one side provides more than adequate sap conduction and callusing, whereas centering a smaller scion in the middle of a larger stock guarantees total cambial misalignment on both sides.
Wrapping Materials: Parafilm Versus Waxed Thread
Once the scion and stock are fitted, the union must be bound with sufficient tension to keep the cambial zones pressed together without shifting, while simultaneously preventing desiccation of the exposed parenchyma cells. The two most common materials used in commercial and research nurseries are specialized polyolefin grafting film (commonly known as Parafilm) and traditional waxed cotton thread. Each carries distinct physical properties that influence union development and nursery labor.
| Characteristic | Parafilm Tape | Waxed Cotton Thread |
|---|---|---|
| Elasticity and Tension | Moderate tension; stretches to form a barrier without constriction. | High structural tension; locks rigid or recalcitrant wood securely. |
| Moisture Retention | Excellent; forms a self-sealing, waterproof membrane over the cut. | Poor on its own; requires top-coating with grafting wax or mastic. |
| Gas Permeability | Semi-permeable to oxygen and carbon dioxide, aiding callus respiration. | Permeable; dependent on the outer sealant applied. |
| Degradation Profile | Photodegradable; breaks down under ultraviolet light after several months. | Slow decay; requires physical slicing in early summer to prevent girdling. |
| Labor Requirements | Single application step; no secondary waxing needed. | Two-step process: binding followed by hot or cold wax application. |
Parafilm offers undisputed benefits for soft or medium-hard woods that fit cleanly without requiring excessive torque. It allows the cut tissues to respire while sealing in crucial internal humidity, and its gradual breakdown under sunlight eliminates the laborious step of walking the nursery rows with a safety razor to sever binding strips. However, when working with tough seedling understocks that have developed a dense, irregular grain, Parafilm often lacks the sheer tensile strength required to close micro-gaps between the tongues.
Waxed cotton thread, by contrast, supplies superior mechanical compression, pulling stubborn faces into intimate contact. Its primary drawback remains the necessity of applying a secondary sealant, such as warm brush wax or an asphalt-based grafting compound, over the entire finished union and the clipped terminal end of the scion. If the wax is neglected or cracks in storage, the graft union will dry out and abort. Where high-value, small-batch proprietary stocks are concerned, many propagators continue to rely on the dependability of thread followed by a dip in low-melting-point grafting wax formulated with beeswax and resin.
Managing Relative Humidity in the Callusing Chamber
The freshly grafted units should not be planted directly into cold soil. Instead, they require a period in an insulated callusing environment to initiate the formation of undifferentiated wound parenchyma, which interlocks and differentiates into new phloem and xylem channels. The optimum temperature for callusing pome and stone fruits sits between 60 and 68 degrees Fahrenheit (15.5 to 20 degrees Celsius). Lower temperatures delay cellular division, prolonging the window for infection, while temperatures above 72 degrees Fahrenheit stimulate premature bud growth, which consumes stored sugars before the plumbing is connected.
Relative humidity inside the callusing crates or room must remain between 85 and 92 percent. If humidity drops below 80 percent, exposed scion tissues, including cut tips and cambial margins, will dehydrate rapidly, causing parenchymal cells to collapse before they can bridge the junction. Conversely, continuous saturation at 98 percent or above suffocates dividing cells and invites virulent outbreaks of saprophytic molds. Monitoring conditions with a calibrated psychrometer or digital sensor is essential: casual estimations based on condensation against the chamber walls are notoriously deceptive.
Pack the dormant bench grafts horizontally into vented plastic totes or slatted wooden crates, bedding the unions in damp, aged pine sawdust, shredded peat moss, or coarse horticultural vermiculite. The medium should hold only enough moisture that a squeezed fistful produces no free runoff, yet stays together in a loose clump. Maintain the grafts in these conditions for a window of 14 to 21 days. Check the boxes weekly: as soon as a milky-white callus ring becomes visible around the exposed perimeter of the cuts, the crates must be moved down to cold storage at 34 to 36 degrees Fahrenheit to check further development until planting conditions permit.
Common Mistakes to Avoid
Even seasoned nursery hands make procedural errors when grafting high volumes under tight spring deadlines. Identifying these pitfalls early prevents the total loss of valuable scion selections and seedling understocks.
- Working with dull tools: A knife that cannot cleanly shave hair dry will crush cell walls rather than cleanly slicing them. Crushed cells form a layer of necrotic debris that forms a physical barrier against callus bridging. Hone the carbon-steel blade on an ultra-fine water stone every 40 to 50 grafts.
- Drying out during handling: Permitting cut scions or prepared rootstock crowns to sit exposed on the workbench for even two or three minutes allows the microscopic film of cell sap to oxidize and evaporate. Keep unworked material under damp burlap and complete the cut, lock, and wrap sequence swiftly.
- Excessive media moisture in callusing boxes: Soaking wet shavings or peat excludes oxygen. Roots and callusing margins require aerobic respiration to generate the energy required for rapid cell division; anoxic conditions reliably produce black rot and sour-smelling media.
- Failing to seal the distal cut of the scion: When the terminal portion of a scion stick is severed above the uppermost bud, that raw cross-section must be covered with wax or film. Leaving it unsealed creates a capillary chimney that siphons moisture away from the critical union below.
- Attempting to match unequal cambiums symmetrically: Centering a 6-millimeter scion down the middle of an 8-millimeter stock creates a gap on both margins. Shift the scion firmly to one side so the inner bark edges form a flush, continuous plane on that single edge.
Practical Next Steps in the Nursery
Once callusing has successfully concluded and the grafted stock has been stabilized back in cold storage, preparations for field or container planting should be carried out without delay. Ground preparation in the nursery rows must ensure a deeply worked, stone-free bed with good internal drainage; planting into cold, waterlogged clay soil will suffocate the stressed root system and halt callused connections before true vascular integration finishes.
Set the grafts into the soil as soon as the ground can be worked in early spring and soil temperatures at a depth of 10 centimeters reach 45 degrees Fahrenheit (7.2 degrees Celsius). Plant the graft with the union elevated roughly 5 to 7 centimeters above the finished soil grade. Burying the union risks allowing the scion cultivar to strike its own roots, which completely bypasses the dwarfing, vigor-modifying, or soil-tolerant attributes of the proprietary seedling understock. Firm the surrounding soil gently to eliminate subterranean air pockets around the trimmed root system, and apply an immediate, light irrigation to settle the profile.
Throughout the first four to six weeks of spring growth, walk the rows weekly to remove any wild vegetative shoots that arise from the understock below the union. These rootstock suckers possess direct vascular access to the root system and will rapidly outcompete the newly emerging scion bud if left unchecked. Cut these suckers off clean at the trunk base rather than pulling them, which can dislodge the fragile graft connection. If unexpected erratic growth, persistent leaf chlorosis, or necrotic margins appear across specific cross combinations, consult a certified plant pathologist or regional extension specialist to evaluate potential latent graft-transmissible viruses or genetic incompatibilities before scaling up production.